Tuesday, 27 March 2012

Enjoy Life Foods Crunchy Cookies Review

Crunchy cookies from Enjoy Life

Enjoy Life was kind enough to send me some of their new gluten-free crunchy cookies to review. I received the 4 flavours: Double Chocolate, Vanilla Honey Graham, Chocolate Chip and Sugar Shortbread (also known as Sugar Crisp on their website). I expected to favour the chocolate, but I actually preferred the sugar shortbread and graham cookies. Altough I am a big chocolate fan, I loved the simplicity and familiar taste of the graham and sugar cookies. I also tend to prefer my chocolate chip cookies chewy rather than crispy. I found the general texture of the crunchy cookies to be a tad on the gritty side (they all use roughly the same flour blend), but I really enjoyed their flavour.

A box of 14 crunchy cookies retails for about $4.29 (179-198 grams per box depending on flavour). I think this is quite reasonable for a nice, easy and very portable snack. I would definitely buy these to take on a vacation or a long road trip.

I am pleased with the quality of this product in comparison to other gluten free boxed cookies that I've tried. As an added bonus, these cookies are also free of milk, peanuts, tree nuts, mustard, sulfites, egg, soy, fish, crustaceans, shellfish and sesame.

Ratings:
(I will leave out a health rating, because these are not really meant to be healthy and it would only bring the rating down)

Double Chocolate and Vanilla Honey Graham

Double Chocolate Cookies


These cookies weren't as flavourful as I expected them to be, but they were still good. As mentioned before, I didn't enjoy the slightly gritty texture and prefer my chocolate chip cookies soft and chewy. I think this cookie would make great ice cream sandwiches or blizzard type milkshakes if crushed up (similar to Oreo). This wasn't my favourite flavour, but I will still enjoy eating them!

Cost: 4.5 stars
Taste: 3 stars
Texture: 2.5 stars

Overall Rating: 3.3 stars


Vanilla Honey Graham Cookies


The flavour of these cookies really surprised me. I had completely forgotten what a graham cracker tasted like, and enjoyed revisiting this taste of childhood (I didn't eat gluten free until the age of 12). While the gritty texture was still present in this cookie, I didn't mind it as much because that is sort of how I would expect a graham cracker to be. These cookies would make great crusts for individual servings of pie or pudding. They could also be crushed up and formed into a graham cracker crumbs in many dessert recipes. They are also great dipped in a simple glass of cold milk.

Cost: 4.5 stars
Taste: 4.5 stars
Texture: 3.5 stars

Overall Rating: 4.2 stars


Sugar Shortbread and Chocolate Chip

Sugar Shortbread Cookies


I loved the light, crunchy, buttery taste of these cookies. I would have to say these are my favourite. They taste like sugar cookies and are even topped off with a little sprinkle of sugar. I still found the texture to be a little gritty, but I like my sugar cookies crunchy.
If you wanted to get creative, these cookies could be decorated with a little icing or even dipped in chocolate. I thought they were perfect eaten plain alongside my afternoon coffee.

Cost: 4.5 stars
Taste: 5 stars
Texture: 3.5 stars

Overall Rating: 4.3 stars


Chocolate Chip Cookies


These cookies were similar to the double chocolate, but without the extra cocoa in the dough. I usually prefer my chocolate chip cookies chewy, so I wasn't a huge fan of the gritty, crunchy texture, but the taste was good. Like the double chocolate flavour, I think these would make great ice cream sandwiches. They are also good with a glass of cold milk.

Cost: 4.5 stars
Taste: 3.5
Texture: 2.5

Overall Rating: 3.5


Thank you Enjoy Life for providing free samples for me to review!

All opinions are my own.

Saturday, 17 March 2012

Breakfast Casserole

gluten free breakfast casserole

This is a super easy recipe for a brunch or even supper. It's filling and tasty and goes a long way when paired with some gluten free pumpkin cream cheese muffins or ginger peach coffee cake and fruit! The leftovers are great too.

You can get a little creative with this recipe if you like. Swap the bacon for ham or chopped up breakfast sausage or add some peppers and mushrooms to the onions. Just make sure the frozen hash browns (and sausage if you're using it) are gluten free, and you should be good to go!


(makes one square baking pan. double the recipe for a larger dish)
Ingredients

4-6 strips of Chopped Bacon (or sausage, ham, etc)
1/4 cup Diced Onion
6 Eggs
1/2 cup Milk
2 1/2 cups Frozen Hash Browns
1/2 cup Shredded Cheddar
1/2 tsp Salt
1/4 tsp Pepper
1/4 tsp Dill Weed (optional)


Directions

Cook bacon or other meat in a frying pan.
Saute onions in drippings or microwave until translucent.
In a bowl, beat eggs with milk and spices.
Spread the frozen hash browns around on the bottom of the dish.
Sprinkle bacon and onions evenly over hash browns.
Pour egg mixture over hash browns (it should just barely cover them)
Sprinkle cheese on top.
Bake at 350 for about 1 hour (until knife inserted in the centre comes out clean)

place hash browns in baking dish
sprinkle sauteed onions and bacon evenly over hash browns
beat eggs with milk and spices
pour egg mixture over hash browns and sprinkle with cheese
bake at 350 for 1 hr
serve with fruit and muffins or coffee cake

Wednesday, 7 March 2012

Enjoy Life Foods Chocolate Review

Enjoy Life Foods
Recently, I received the Double Chocolate Crunch Granola and Chocolate Mega Chunks to review from Enjoy Life Foods. I have never tried any products from this company, and was excited to check them out. The great thing about Enjoy Life Foods is that their products are not only gluten free, but also free of peanuts, dairy, tree nuts, eggs, soy, fish and shellfish (and some are free of even more common allergens). This is great company for people with multiple allergies.


Mega Chunks (for baking)


I know these are for baking, but I couldn't help but pop a few chocolaty morsels in my mouth when I received the package. They were very dark and rich. I couldn't wait to try them in a recipe. I was planning to make some peanut butter banana chocolate chip muffins (as you can see, I'm not allergic to nuts...) so I used the mega chunks in place of my regular semi-sweet chocolate chips. At first I was sceptical about the size of these things, but the muffins turned out great. They were nice and chocolaty, even though I only used 1/2 cup in 16 muffins. I'm sure these would also be great in cookies or blondies (like pictured on the package).

Gluten Free Banana Peanut Butter Chocolate Chunk Muffins
The Mega Chunks range in cost from $4.50 to $5.00 online (http://enjoylifefoods.elsstore.com/ and others). I'm not sure about in-store prices. This is roughly $1-2 higher than similar, non allergy-friendly products. I would call it expensive, but good quality and reliable when it comes to allergies.
Cost        2.5 stars
Taste       5 stars
Texture    5 stars
Overall Rating: 4.2 Stars

Double Chocolate Crunch Granola

When I first tasted this granola dry, I found the texture way too crunchy (hard on the teeth). It was better with milk and even better with warm milk. It was very chocolaty, as the name suggests, and fairly sweet. If you like chocolate cereal, this granola is for you. It's nice to have a granola that is free of wheat, oats and nuts for people with multiple allergies.
There are 4 grams of fibre per serving and lots of added vitamins and minerals, making it a fairly healthy snack or breakfast option.
The online costs for this product ranges from $5.99 to $6.49. For granola, this is a fairly reasonable price.
Health      4.5 stars
Cost         3.5 stars
Taste        3.5  stars
Texture    2  stars
Overall Rating: 3.4 Stars


Thanks Enjoy Life Foods for providing these free samples for me to review. All opinions are my own.

Saturday, 25 February 2012

Naan Bread

gluten free naan bread
It's been awhile since I've posted a recipe. I seem to have made my way through every common illness in the past few weeks from barfing to sinus cold... and of course the angiogram before that. I am still trying to shake that last bit of a sinus cold, but other than that I think I'm good to go.

I haven't had much energy for baking, but I have been meaning to post this recipe for awhile. I found it on the GF blog Fire and Salt and knew I had to try it. I made some tiny changes, but definitely have to give this guy the credit. The bread is chewy and soft. The only downside is that it does not keep well, so only make what you think will be eaten for one meal (once it cools it becomes dense and dry).
I have made this recipe twice with great results!

Recipe from:
http://fireandsalt.blogspot.com/2010/09/gluten-free-naan-bread.html

(makes 4 Naan Bread)
Ingredients

2 tsp Yeast
2 tbsp Sugar
1/2 cup Warm Water
2 1/4 cups GF All-Purpose Flour Blend
1 tsp Salt
1/2 tsp Guar Gum
1 Egg
1-2 tbsp Milk
Butter or Oil for frying
Optional: 1 tsp garlic powder (I left this out)

Directions

Proof the yeast with the sugar and warm water. (about 5 mins)
Combine dry ingredients in mixing bowl.
Add egg, milk and prepared yeast mixture.
Mix well by hand or in stand mixer.
Separate dough into 4 equal balls.
Dust parchment paper with rice flour and roll out each ball of dough into the shape of naan bread. (they should be a bit bigger than your hand - or your husband's hand)
Place on a flat, portable surface (cutting board or baking pan), cover with a tea towel and let rise in a draft free place for 20-30 minutes.

* be very careful when transferring the risen bread to the frying pan as they are very breakable. Try not to let them bend at all. They will be much more stable after they cook.

Heat oil or butter in a frying pan and cook naan bread one at a time
Fry 3-4 minutes per side until it starts to brown a bit.

Heat your oven to 250 degrees.
Once all the bread is cooked, wrap them up (all together) in foil and place them in the oven for 5 minutes. The steam makes the bread nice and chewy.

roll out dough on parchment paper


let rise for 20-30 minutes
cook in the frying pan for 3-4 minutes per side (or until it browns like this)
wrap the bread in foil and place in 250 degree oven for 5 mins
serve immediately with dip, souvlaki or curries

Serve with Curry, Butter Chicken or Souvlaki. You can also eat it with hummus or other dips as a snack or side dish.

When it's just me and my husband, I usually make half the recipe.

Enjoy!

Tuesday, 7 February 2012

Coconut Pudding


Gluten Free Coconut Pudding
I am home recovering from a coronary angiogram. They stuck a catheter into my heart through a vein in my neck and one in my radial artery (wrist) too. Results were good, but I'm not supposed to use my wrist much for a week because of the bleeding risk. This includes typing (and sadly, crocheting) so this post will have to be short.


Coconut Toasting
I loved making this for dessert as a kid. So easy and so good. If you love coconut, you'll love this pudding too.

See, short and sweet. Now for the recipe.

(makes 4 servings)
Ingredients

1/2 cup Sugar
pinch of Salt
3 1/2 tbsp Cornstarch
2 cups Milk (could sub other milks if dairy intolerant)
2 eggs
1/2 +1/4 cup Shredded Coconut
1 tbsp Coconut Oil (or Margarine)
1 tsp Vanilla or Coconut Extract  - optional

Directions

In a medium saucepan, whisk together cornstarch, milk, and eggs.
Add sugar, salt, 1/2 cup coconut and coconut oil.
Bring mixture to a boil over med-high heat.
Reduce heat and stir until thick.
Remove from burner and add extract if using.
Stir and let cool a bit. (can be served warm or chilled)

Meanwhile, add 1/4 cup shredded coconut to frying pan (non-stick preferably).
Toast on high heat, stirring very frequently, until coconut is browned and fragrant (This only takes a few mins. Don't let it burn.)
Let cool.
Use as a garnish for each dish of pudding.


Whisk milk, eggs, cornstarch together and add other ingredients

Bring to a boil, reduce heat and stir until thick

Once thick, set aside to cool.

Toast coconut in frying pan

Stir very frequently

Toast until browned and fragrant


Garnish pudding with toasted coconut

Variation - omit 1/4 cup coconut and toast the rest. Instead of adding it to the pudding before cooking, stir it in after the pudding has thickened and cooled somewhat.

Tuesday, 24 January 2012

Breadsticks


Gluten Free Breadsticks
My mom used to make me these breadsticks for school lunches. I would take a bag of breadsticks with a little container of tomato sauce and maybe a pepperoni stick or some cheese slices and fruit. They are nice and easy to transport and they also freeze well. My gluten-eating husband has been requesting breadsticks a lot lately and I was starting to get a little jealous, so I decided to make some of my own. I'm planning to whip up a big batch for the upcoming Superbowl!

Go Pats!


I use my white buns recipe for these breadsticks. I usually make the whole recipe so I have enough to make some buns too. Why not make the most of the mess! It's a little tricky to make 1/3 of the recipe anyway. I did my best to give you the alternate measurements.

I use about a third of the dough for an 8x8 pan or roughly 2/3 of the dough for a 9x13 pan. If you want to make all breadsticks, use an 8x8 pan and a 9x13 pan. Otherwise, just make buns out of what's left over using the directions from this recipe.


(for 1/3 of this recipe use the measurements in the square brackets)

Ingredients

1/2 cup warm water                                       [2 Tbsp + 2 tsp]
2 tsp sugar                                                     [just under 1 tsp]
4 tsp dry yeast granules                                  [1 1/3 tsp]

2 cups white rice flour                                    [2/3 cup]
2 cups tapioca flour                                        [2/3 cup]
1/4 cup sugar                                                 [1 Tbsp + 1 tsp]
4 tsp guar gum (replaces the gluten)                [1 1/3 tsp]

1 1/2 tsp salt                                                  [1/2 tsp]

1 -1 1/4 cups milk (usually 1 cup is enough)    [1/3 cup]
4 tablespoons oil                                            [1 Tbps + 1 tsp]
1 teaspoon vinegar                                         [ 1/3 tsp - just estimate]
3 eggs                                                            [1 egg]
1/4 cup ground flax (optional)                         [1 Tbsp]


 Directions

Combine warm water, sugar, and yeast in a small bowl and let it proof.
Combine rice flour, tapioca flour, sugar, guar gum, and salt together in largest mixing bowl.
Combine milk, oil, vinegar, and eggs in a smaller bowl.
Add wet mixture, flax, and yeast mixture to the dry ingredients and mix on high for 4 minutes.Spread into greased 8x8 pan and let rise 20 minutes.
Brush italian or greek dressing on the breadsticks
Bake at 350 for 15- 20 minutes or until edges begin to brown.

Let cool and slice into sticks. Serve with tomato sauce.

 
spread dough in greases pan and let rise


brush with italian dressing


bake and let cool

serve with tomato sauce

Thursday, 12 January 2012

Quinoa Brownies


Gluten Free Quinoa Brownies
A friend of mine gave me this very interesting looking recipe (thanks Steph). She got it from a friend of hers so I'm not exactly sure where it originated. It's genius really. No flour, starch or meal of any kind. Just cooked quinoa! It seems too easy, I know, but it tastes soooo good and it gets health points for using whole grains with plenty of fibre and protein (we can ignore the 6 Tbsp of butter for now). I am wondering how the same recipe would work if I used brown rice in place of quinoa. It would definitely be cheaper. I'll give it a try and report back.
(Reporting Back: not as great as I had hoped. The brown rice didn't blend as well so there were obvious chunks of rice in it. still tasted great, but the texture was off)
quinoa in blender
I did so much baking before Christmas that I was kind of getting sick of it. Now that most of the residual Christmas treats have been gobbled up, I'm starting to get back into experimental baking. I have decided that working (part time as an educational assistant) is just not worth the chest pain and exhaustion for now, so I am going to look for something I can do from home. So far, no luck.
When I do have some energy, I will use it too cook, clean and bake! (my husband doesn't complain)


I'm also trying to make my food a bit healthier (it is January, after all)... stuff like sneaking quinoa into a brownie, tossing ground flax in my muffins, making oatmeal cookies, and adding a little less sugar (I really can't afford the fancy agave syrup that healthier individuals might substitute). It's kind of a relief after the butter laced shortbread and fudgy, sweet indulgences of the holidays. You can only keep that up for so long!

So for us, it's lots of veggies, whole grains, and quinoa brownies!

(makes one square 8x8 baking pan)
Ingredients

1 cup Cooked Quinoa
3-5 Tbsp Milk (start with 3 but add more if the mixture is too thick for the blender. I used 5)
2 Eggs
1 tsp Vanilla
6 Tbsp Melted Butter or Margarine (or canola oil)
3/4 cup Sugar
1/2 cup Cocoa Powder
3/4 tsp Baking Powder
1/4 tsp Baking Soda
1/4 tsp Salt

Directions

Line an 8x8 square baking dish with wax paper (or just grease the dish).
Blend cooked quinoa, milk, eggs, vanilla and butter in a blender or food processor until smooth and creamy.
In a bowl, mix sugar, cocoa powder, baking powder, baking soda and salt.
Add dry mixture to the blender and blend until well mixed. (add the extra milk here if needed)
Scrape batter into prepared dish.
Bake at 350 for 35-45 minutes or until toothpick comes out clean.
Let cool. Cut into 9 pieces.
Top with icing, melted chocolate or whipped cream. Or just eat as is!


put wet ingredients in a blender


blend until smooth and creamy


mix dry ingredients separately and add to blender

blend well (add more milk if too thick)

pour into prepared pan

bake at 350 for 35-45 mins

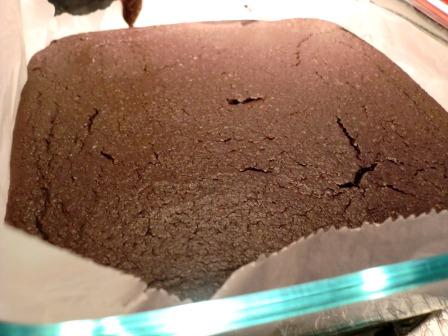
cool, cut and serve


I think these could make some pretty sweet cupcakes too. They have a cake-like texture. I'll put that on my mental "to try" list along with these delicious looking oreo cookies from Gluten Free Gobsmacked!
http://glutenfree.wordpress.com/2009/01/08/gluten-free-homemade-oreos/