Friday, 25 October 2013

Hot Multigrain Cereal

Gluten Free Hot Multigrain Cereal

Before I had Celiac Disease, I really enjoyed having cream of wheat cereal for breakfast. I was missing it the other day and realized I could probably do something similar with rice. I was afraid that cream of rice would seem too much like baby food, so I thought I could add some other healthy, whole grains to the mix. You could probably use any grain (or seed) you want, but my favourite combination is millet, quinoa and brown rice. I also like buckwheat when I have it on hand.

with milk and brown sugar

I use my coffee grinder to grind the grains, but you could probably just as easily use a food processor. As long as the grains are ground quite fine, this would probably work great as a baby cereal too.
Top with milk and brown sugar or honey, nuts and raisins, or whatever sounds good to you.

Makes about 6 servings
Ingredients

1/2 cup Millet
1/2 cup Quinoa
1/2 cup Brown Rice

Directions

In batches, grind the grains until quite fine (not as fine as flour but not big chunks). Use a clean coffee grinder or food processor.
You can use a fine mesh strainer to remove any large chunks.
Combine in an airtight container and store for 1-2 months.

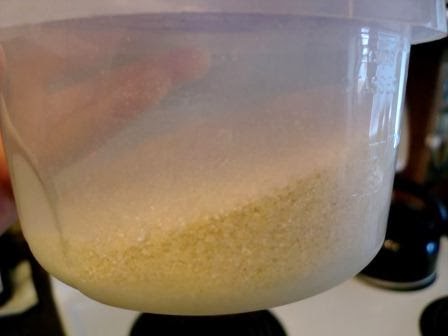
store in airtight container


To Make

Stove top (1 serving)

Bring 1 cup water to a boil in a small saucepan.
Whisk in 1/4 cup dry cereal.
Turn down to med-low and continue to stir often for 5-7 minutes, or until desired consistency is reached.

Microwave (1 serving)

In microwave safe bowl, combine 1 cup water with 1/4 cup dry cereal.
Microwave 1 minute, stir well, smoothing out any lumps. Microwave 45 seconds, stir. Continue microwaving in 20-30 second intervals, stirring often, until cereal has reached desired consistency.

1/4 cup dry cereal
 
whisk into 1 cup boiling water, turn down heat, and cook 5-7 minutes
 
serve with milk and brown sugar

Hot and Sour Soup

Gluten Free Hot and Sour Soup

I am almost 16 weeks pregnant and am just starting to enjoy food again (thank goodness)! I haven't been cooking or blogging much lately because I've been feeling so crappy. Today I am at home sick and am trying to stick to natural remedies as much as possible. I just made a pot of this soothing soup for lunch!

This soup is great for when you have a cold. The spice and steam will help to clear out your nose and the broth will help you get those much needed fluids. The fresh ginger and garlic are great for your immune system too. It's super quick to make, so you don't have to spend too much time standing over the stove when you feel crappy.

You can adjust the spice level to suit your family's preferences. I would say my version of the soup has a medium level of spice. The noodles give the soup a bit more substance, but you can leave them out if you want a very light, brothy soup (It would make a great appetizer).  The recipe only makes 3 servings but can be easily doubled.

serves 3
Ingredients

1 1/3 Tbsp Fresh Ginger, minced or finely grated
3 Cloves Fresh Garlic, minced or finely grated
1/2 tsp Olive Oil
1 Medium Carrot, grated
1 Egg, well beaten
1 1/2 Tbsp GF Beef Soup Base/Boullion (use more if needed)
5 Cups Water (or omit beef soup base and use 5 cups prepared beef broth)
2 tsp Sriracha Hot Sauce (or your favourite hot sauce)
1 Square Rice Noodles (or enough to make around 1 1/4 cups cooked)
1 1/2 Tbsp Lemon Juice

Directions

In medium sauce pan, saute garlic and ginger in olive oil for 1 minute.
Add water, beef soup base, grated carrot and hot sauce.
Bring to a boil for 5 minutes.
Add uncooked rice noodles and boil for another minute or 2. (you could also cook noodles separately and add them at the end)
Beat 1 egg and slowly pour into soup while stirring slowly (it should cook instantly)
Add lemon juice.
Taste and make adjustments (more broth, lemon juice, hot sauce, etc)
Serve and breath in the theraputic steam!


ginger, garlic and beef broth


Add carrots, boil 5 minutes and add rice noodles


Drop in egg while stirring slowly and finish with lemon juice


Tuesday, 6 August 2013

Chocolate Banana PB Muffins

Gluten Free Chocolate Banana PB Muffins
This is a decadent take on my Banana Chocolate Chip Muffins. Of course the peanut butter adds a few more calories, but it also boosts the protein content, keeping you fuller for longer. If peanuts are a problem for you, go ahead and substitute other nut/seed butters.


Since I'm adding cocoa powder to the muffins, I often leave out the chocolate chips (especially if I'm eating these for breakfast). Go ahead and adapt the recipe to your preferences (maybe use a little less sugar, sub peanut butter chips or white chocolate for chocolate, add some cinnamon and nutmeg, etc)

makes 15-17 muffins
Ingredients

1 3/4 cups light flour blend (see flour blends) (or your favourite flour blend)
1/2 cup Sugar
1 Tbsp Baking Powder
1/2 tsp Salt
3 Tbsp Cocoa Powder
1 cup (3 medium) Mashed Bananas
2 Eggs
1/4 cup Canola Oil
1/4 cup Peanut Butter
1/4 cup Milk
1/2 cup Chocolate Chips (optional)

Directions

In a large bowl, mash bananas.
Mix in oil, eggs, peanut butter and milk.
Mix all remaining ingredients except chocolate chips and gently combine with wet ingredients.
Stir in chocolate chips.
Fill muffin paper lined muffin tins 2/3 full with batter.
Bake at 375 for 15-20 minutes (until top holds it's shape when poked)
Let cool on cooling rack or tip sideways in muffin tins (ensures the bottom of the muffins don't get soggy)
Once cool, freeze in a freezer bag or container.
For best results, heat individually in the microwave until thawed.

fill muffin tins 2/3 full
Bake at 375 for 15-20 minutes
let cool


Saturday, 20 July 2013

Enjoy Life Soft Baked Bars Review

Gluten Free ELF Soft Baked Bars

I recently received the new soft baked bars from Enjoy Life Foods to review. They sent me one box of every flavour, including: cinnamon bun, chocolate sunbutter, cherry cobbler and s'mores.
The first thing I noticed was the great look of the boxes. They are bright and colourful, and would definitely make the product stand out on the shelf.


Overall I really enjoyed these bars. They were chewy, moist and flavourful. The price per box on the Enjoy Life Website is $5.29, making them one of their most expensive snack products. I would buy these bars again, but I would probably wait for a sale (they sell them at Superstore) because over a dollar per bar seems a little steep.


Cinnamon Bun

If I had to name this bar I would call it apple cinnamon. This name does not sound as appetising as cinnamon bun, but I think it better describes the flavours. There are chunks of dried apple, cinnamon, and orange peel inside the bar. Even though the product didn't taste the way I had expected, I really enjoyed the flavours and soft chewy texture. My gluten-eating husband commented that these bars don't have that weird grainy/powdery texture that some gluten free foods have. The cinnamon bun was my second favourite out of the 4 flavours I reviewed.
Each bar contains 1 gram of fibre, 11g of sugar and 130 calories. In other words, they make a delicious snack but do not qualify as a health bar.

Health       3 stars
Cost          3 stars
Taste         4.5 stars
Texture     4.5 stars

Overall Rating: 3.75 stars


Chocolate Sunbutter

This flavour was by far my favourite. It tasted so much like an Eatmore chocolate bar. The texture was soft and fudgey with little chocolate chips and chunks of sunflower seeds inside. I think I would actually make a trip to the store to just to buy these.
Each bar contains 140 calories, 1 gram of fibre and 9 grams of sugar.

Health 3 stars
Cost 3 stars
Taste 5 stars
Texture 5 stars

Overall Rating: 4 stars

Cherry Cobbler

These bars had a really soft and moist texture. The flavour was quite sour (probably because it contains dried tart cherries). Based on taste alone, I would probably call these bars berry spice or apple berry. The bars contained chunks of dried apples, small pieces of dried tart cherry, cinnamon and cloves. This flavour was alright, but probably my least favourite.
Each bar contains 140 calories, 1 gram of fibre and 12 grams of sugar.

Health       3 stars
Cost          3 stars
Taste         4 stars
Texture     5 stars

Overall Rating: 3.75 stars

S'mores

The texture in this bar was a little different than the rest. It was less soft and chewy and more like a dense rice crispie square (not necessarily in a bad way). The bars contain marshmallow, lots of chocolate and even GF graham cookie pieces. I whole-heartedly agree on the naming of this flavour, unlike some of the other ones. It was my third favourite of the 4.
Each bar contains 140 calories, 1 gram of fibre and 10 grams of sugar.

Health      3 stars
Cost         3 stars
Taste        4.5 stars
Texture    4.5 stars

Overall Rating: 3.75 stars


Thanks Enjoy Life Foods for providing these free samples for me to review. All opinions are my own

Tuesday, 2 July 2013

Watermelon Mojito Salad


This is my first try writing a blog post from my phone. I didn't even realize it was possible, but what can't smartphones do these days!
It's a simple one. Only 4 ingredients (3 if you make it virgin). Amounts can be adjusted according to your personal preference. I just eye-balled it and tasted as I went, so don't feel like you have to follow the recipe exactly. 

Serves 4 
Ingredients 
4-5 cups watermelon cubed
1/2 lime (zest and juice) 
8-10 large mint leaves
1-2 oz white rum (we used Malibu) or to taste

Directions

In a large bowl, combine watermelon cubes (or get fancy and use a melon baller), lime zest and juice, and rum. 
Refrigerate for a few hours, stirring occasionally, or not if you didn't plan ahead. 
Lay mint leaves on top of one another and roll tightly. Slice thinly and sprinkle on salad.
Stir again and serve with a few mint leaves as garnish. 


Bring this to the next BBQ you get invited to. You might want to make a kid version and an adult version though!

Sunday, 16 June 2013

No Bake Chocolate Lovers Pie

Gluten Free No Bake Chocolate Lovers Pie

This recipe comes from my mom. I have never made it, but I have tasted it and it's delicious! Very sweet and creamy. This is a great make ahead dessert because you can easily make the pie in stages (crust one day, filling another and freeze for up to a month). It's also great for summer because you don't have to turn on the oven!

makes 1 pie
Ingredients

Coconut Crust
1 cup Unsweetened Dried Coconut
3/4 cups Icing Sugar
1/3 cup Cocoa Powder
1/3 cup Margarine or Butter
1/4 tsp Salt

Chocolate Filling
1 envelope Unflavoured Gelatin
 Tbsp Cold Water
2 Tbsp Instant Coffee Granules
1/4 cup Boiling Water
1 cup Sugar
1/2 cup Cocoa Powder
2 Cups Whipping Cream (before you whip it)
1 tsp Vanilla


Directions

Coconut Crust
Toast 1 cup of unsweetened coconut in frying pan over medium heat stirring constantly.
In a bowl, sift together icing sugar, cocoa powder and salt.
Melt margarine.
Combine coconut, margarine and dry mixture.
Press into a greased pie plate or parchment lined 9 inch spring form pan ( I would recommend spring form pan because it will come out a bit easier... especially that first piece)
Pie crust can be frozen for a later date or move straight to making the filling.

Chocolate Filling
Sprinkle gelatin over cold water; let stand 5 minutes to soften.
Add coffee granules and boiling water; stir until dissolved.
Let cool 5 minutes.
Combine sugar and cocoa powder with coffee mixture.
In a mixing bowl (or with a hand mixer) whip the cream and vanilla to about 2/3 of the normal whip cream thickness.
Slowly add coffee mixture to cream while continuing to whip it.
Whip until the mixture is stiff and pour into crust.
Chill a few hours to let set or you can freeze it for a later date.
For added decadence, top with a dollop of whipped cream and chocolate shavings before serving.
Crust Mix
Press mixture into pie plate or spring form pan


Coffee and gelatin mixture

Dry ingredients added
Finished product

Saturday, 15 June 2013

Fudgesicles

Gluten Free Fudgesicles

Most (if not all) fudgesicles contain gluten, but that doesn't mean you have to go without! They are actually super fast and easy to make. All you need is milk, cocoa powder, corn syrup, sugar and vanilla (optional). Of course I forgot to take pictures of the final product... I guess we were too busy eating them.

Popsicle molds are really cheap. I got mine for 2 bucks from superstore and it works just fine.

Makes 7-8 fudgesicles

Ingredients

2 cups Milk
1/3 cup Cocoa Powder
1/2 cup Sugar
2 Tbsp Corn Syrup (or sub Agave Syrup)
1 tsp Vanilla Extract

Directions

Put all ingredients into a medium sauce pan.
Put on stove at medium heat, stirring very often, until all ingredients are combined. Don't let the mixture boil.
Remove from heat and carefully pour into popsicle molds. (If you don't have enough room in your molds you can freeze any remaining liquid in a plastic storage container and eat by the spoonful)
Insert sticks and freeze for 6-8 hours or overnight.

Add ingredients and mix
Heat and stir until all ingredients are combined
Pour mixture into popsicle molds
Insert sticks
Freeze for 6-8 hours